

NetBox Export Templates: A Guide to Generating Powerful Export Templates


In this blog post, we will discuss how to use NetBox to create export templates that can be used to generate reports of all virtual machines and clients that are impacted by upcoming firewall maintenance.
To achieve this, there are four key components that you need to understand:
Identifying the most suitable queryset
Establishing model links
Accessing model attributes
Configuring the Jinja2 template
Identifying the most suitable queryset
The first step in creating an export template is to identify the queryset that will be used to generate the report. In this case, we want to generate a list of all virtual machines that have an IP address within a specific prefix.
Filtering by virtual machines or their interfaces is not possible in the NetBox interface, as none of the list views allow you to filter by these entities. Therefore, the most efficient way to do this is to use the IPAddress list view and filter by the Parent Prefix field. However, this does not directly filter virtual machines based on their interface IP addresses. This is where establishing model links comes in.
Establishing model links
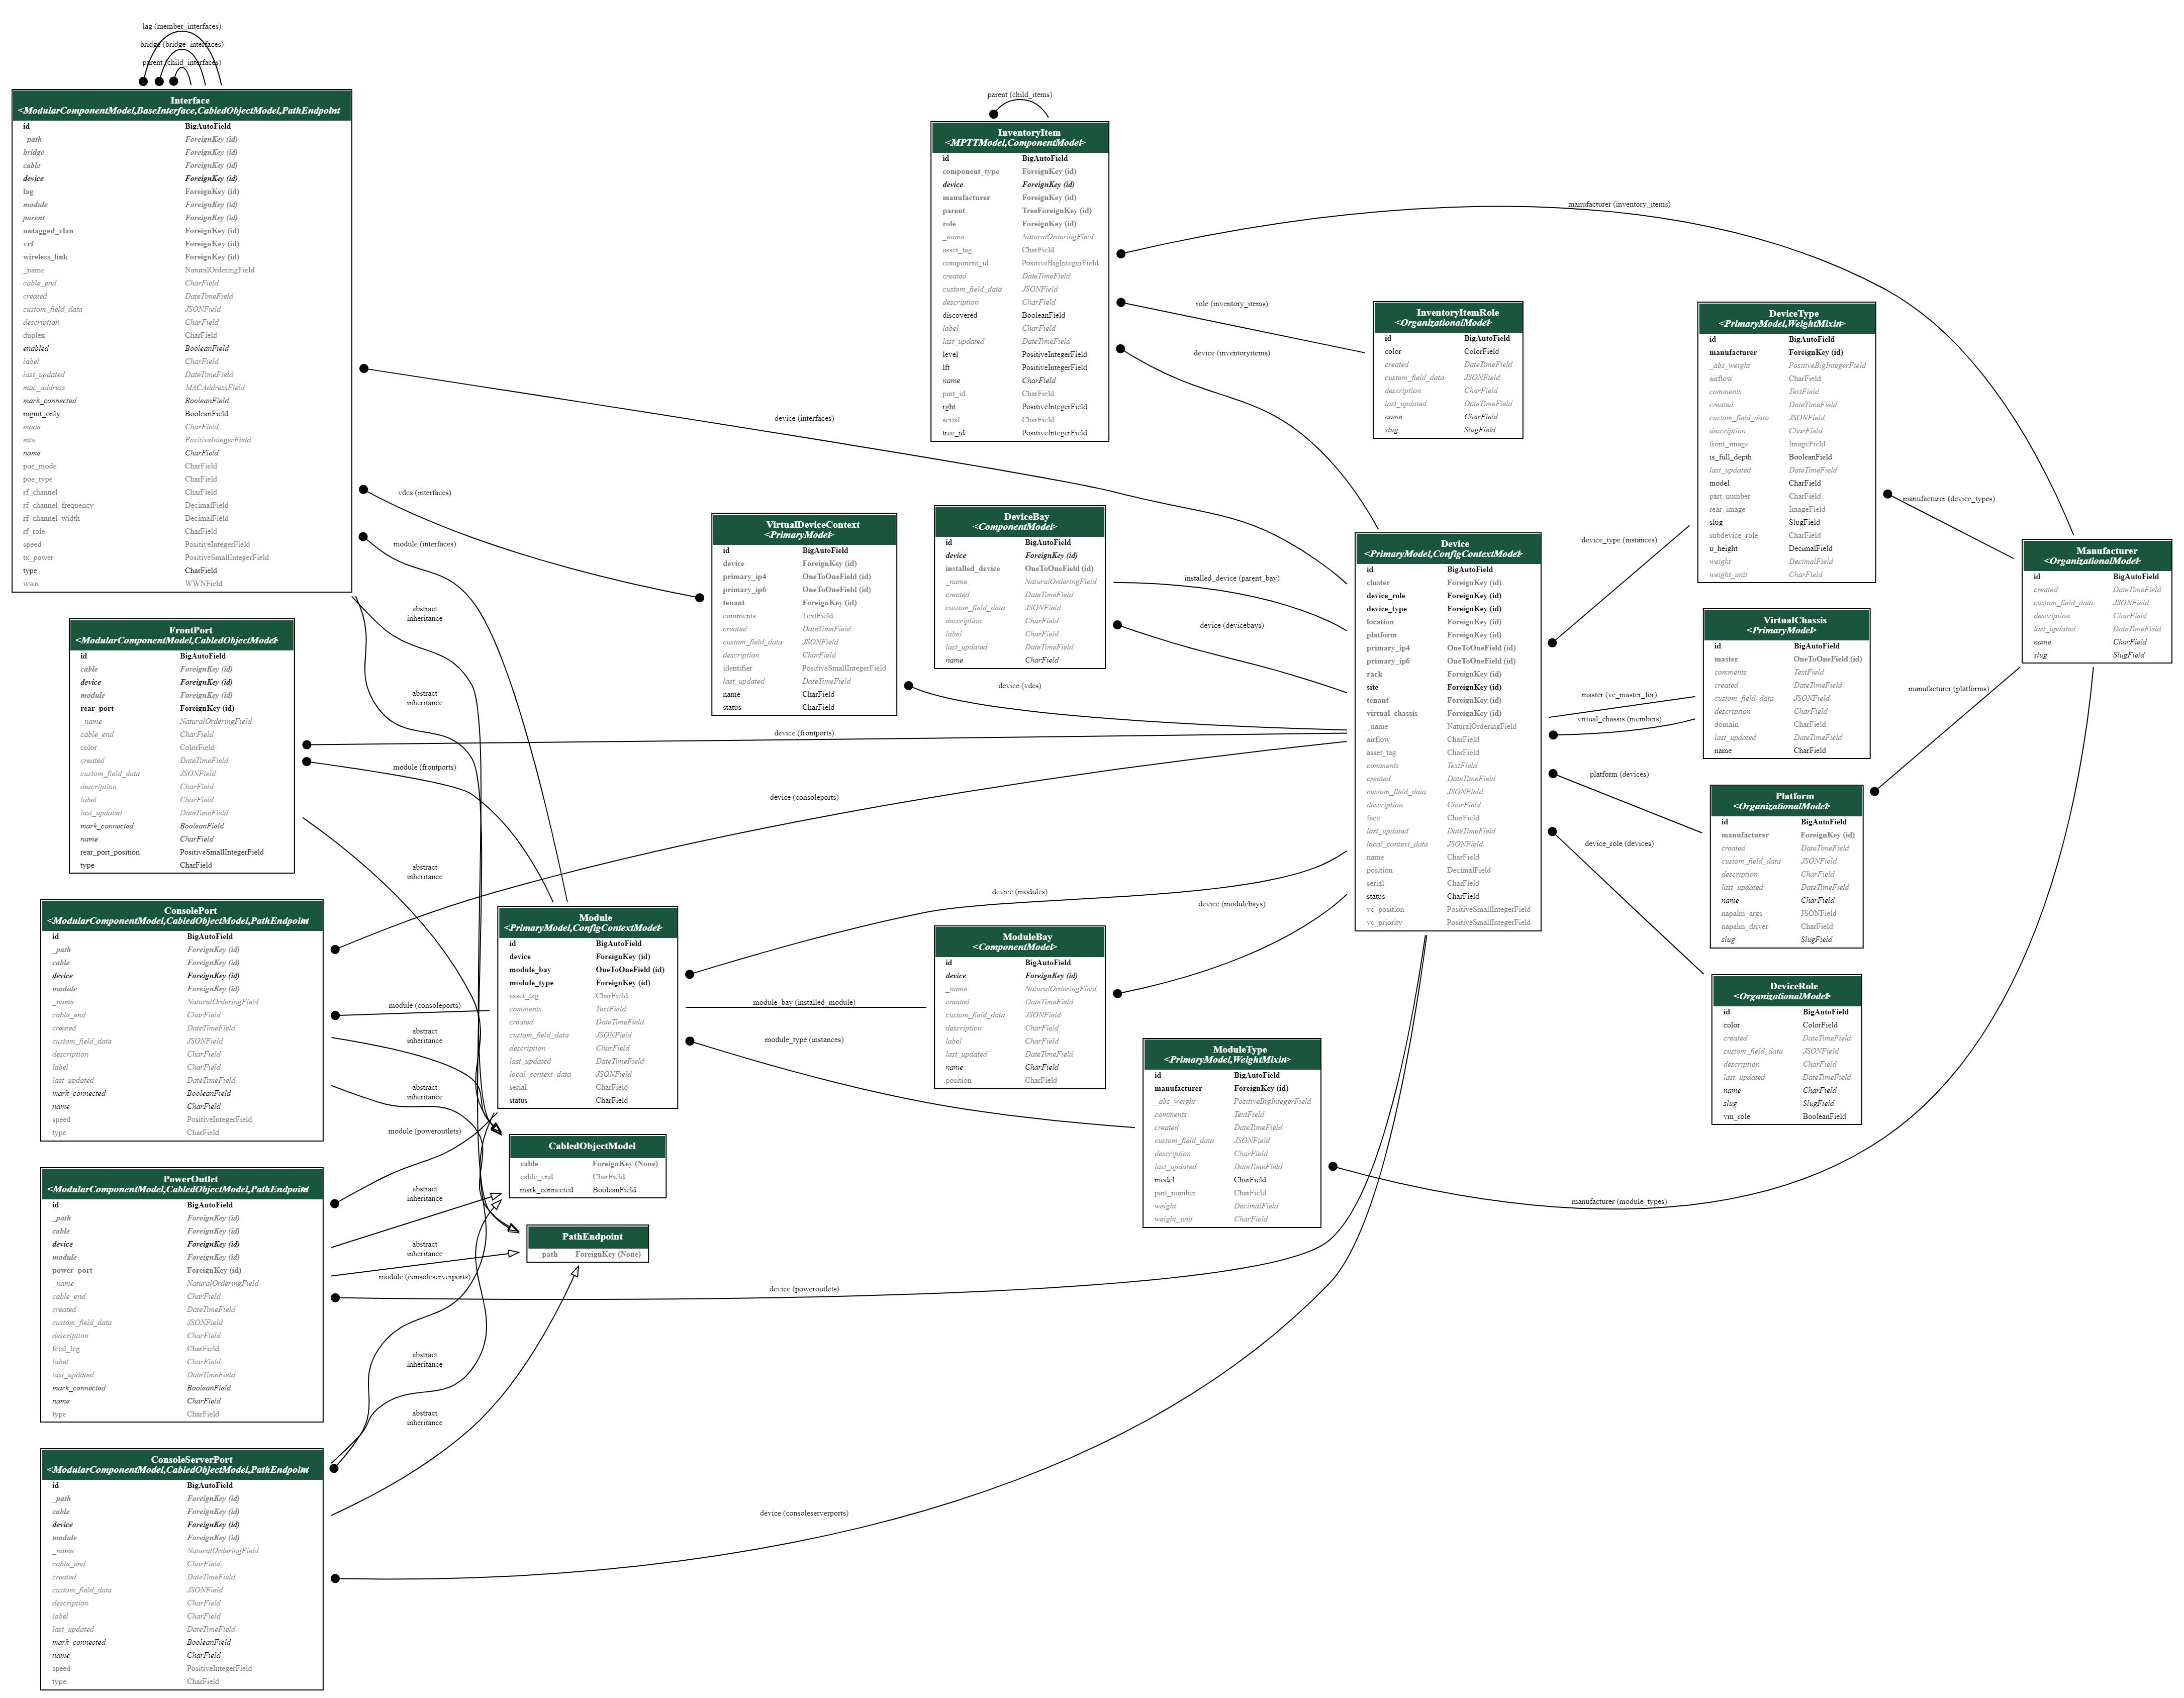
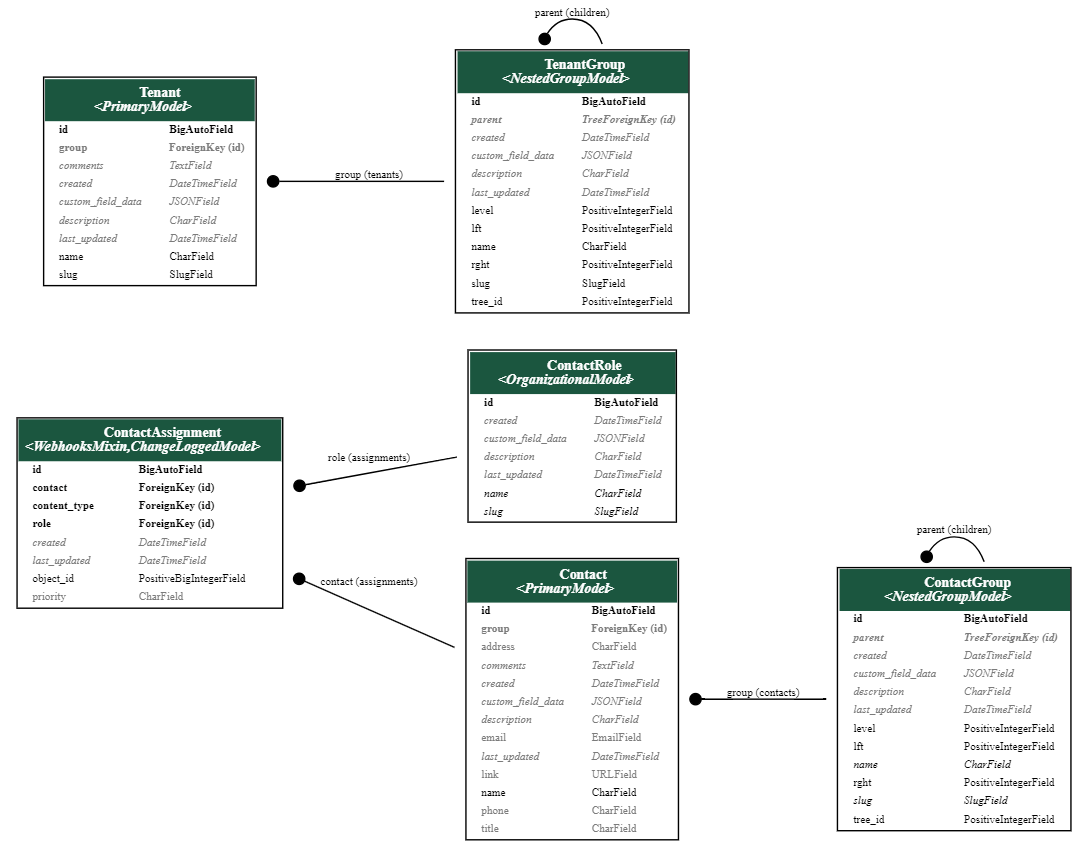
This can be the most challenging part of the process, as it requires a solid understanding of NetBox models, both their direct and generic relationships. To facilitate this task, refer to the Images below for visual guidance. You can click on the images to see a larger version.
DCIM APP
IPAM APP:

TENANCY APP
VIRTUALIZATION APP
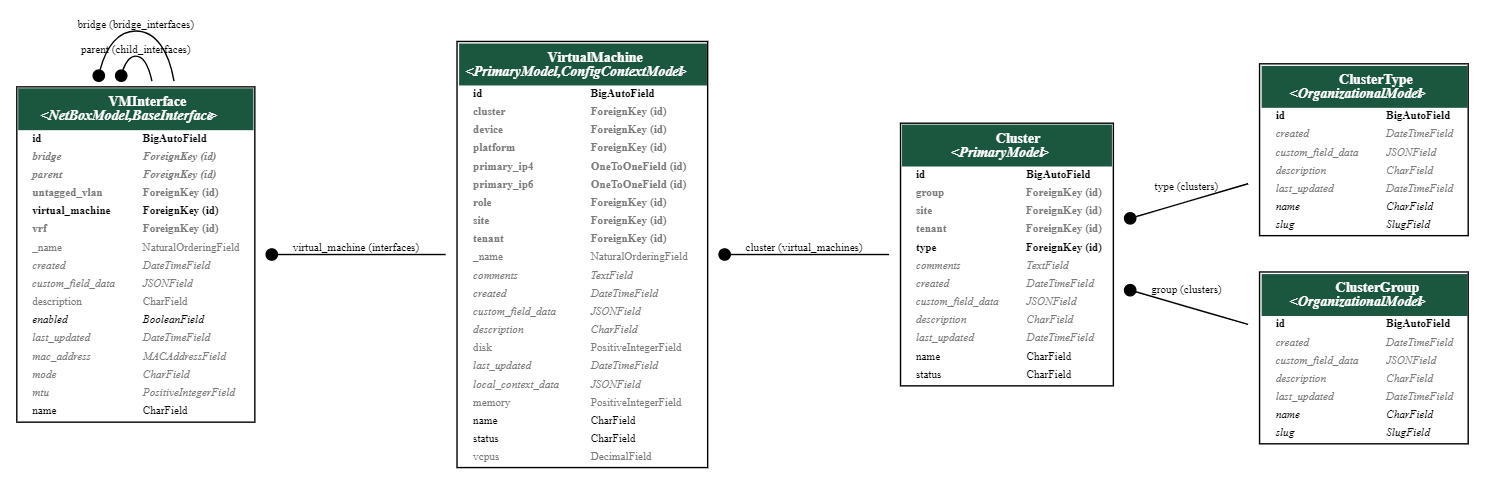
Linking IPAM, VIRTUALIZATION and TENANCY
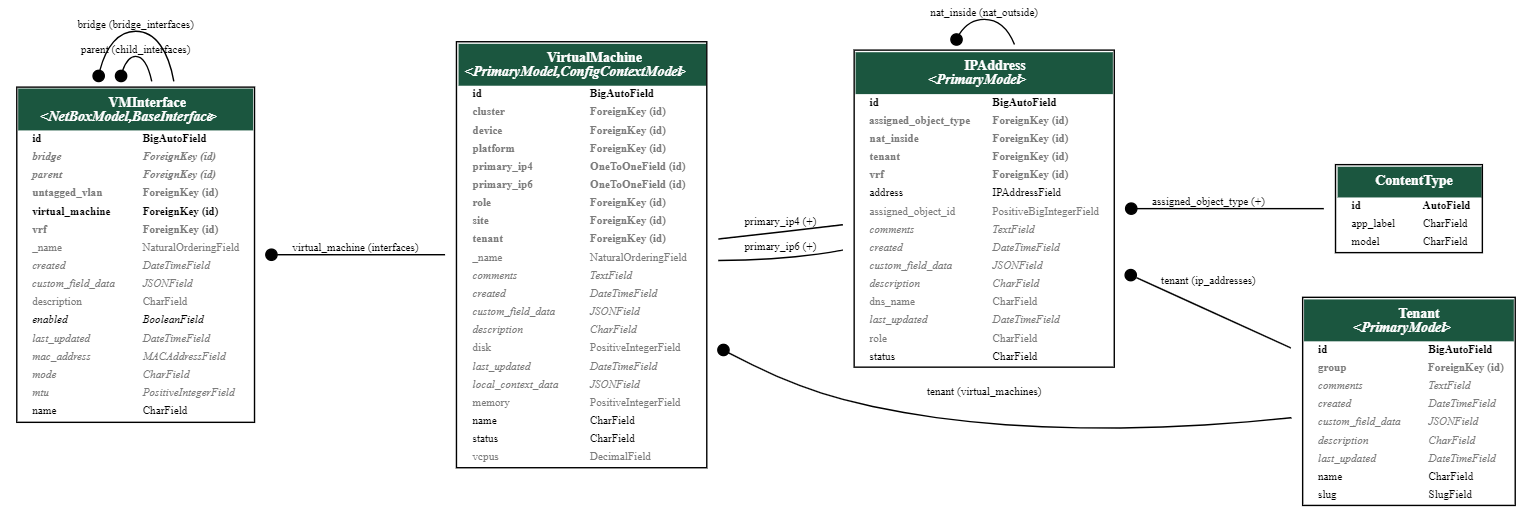
As you can see from the diagrams, the IPAddress model does not have a direct relationship with the VMInterface model or the Interface model. This is because the IPAddress model uses a generic foreign key relationship.
To access a VMInterface model from the IPAddress model, you need to first check if the assigned_model_type field equals virtualization.vminterface. If it does, then you can use the assigned_object attribute to access the VMInterface model.
Accessing model attributes
With the models' relationships in mind, you need to navigate through them and extract the attributes from each. In this blog example, the export template starts working with the provided queryset and iterates over each IPAddress from it.
For each IPAddress, the report must test if it is assigned to a VMInterface. If it is, then the report can access the Interface and its VirtualMachine. Finally, the report can get the Tenant data from the VirtualMachine, as shown in the following Python snippet :
for ip_address in queryset:
    if (ip_address.assigned_object_type.app_label == 'virtualization') and (ip_address.assigned_object_type.name == 'interface'):
        ip = ip_address.address
        virtual_machine_interface = ip_address.assigned_object
        virtual_machine = virtual_machine_interface.virtual_machine
        tenant = virtual_machine.tenant
        print(f"{ip},{virtual_machine.name},{tenant.name}")
Configuring the Jinja2 template
This is the last step before configuring the export template in NetBox. To do this, you need to build the Jinja2 template that will generate your report. To help you build the template, first try to write some Python code that prints the desired output, like the snippet in the previous session.
Then, convert the syntax from Python to Jinja2 and remove any additional spaces and line breaks, like the following Jinja2 template:
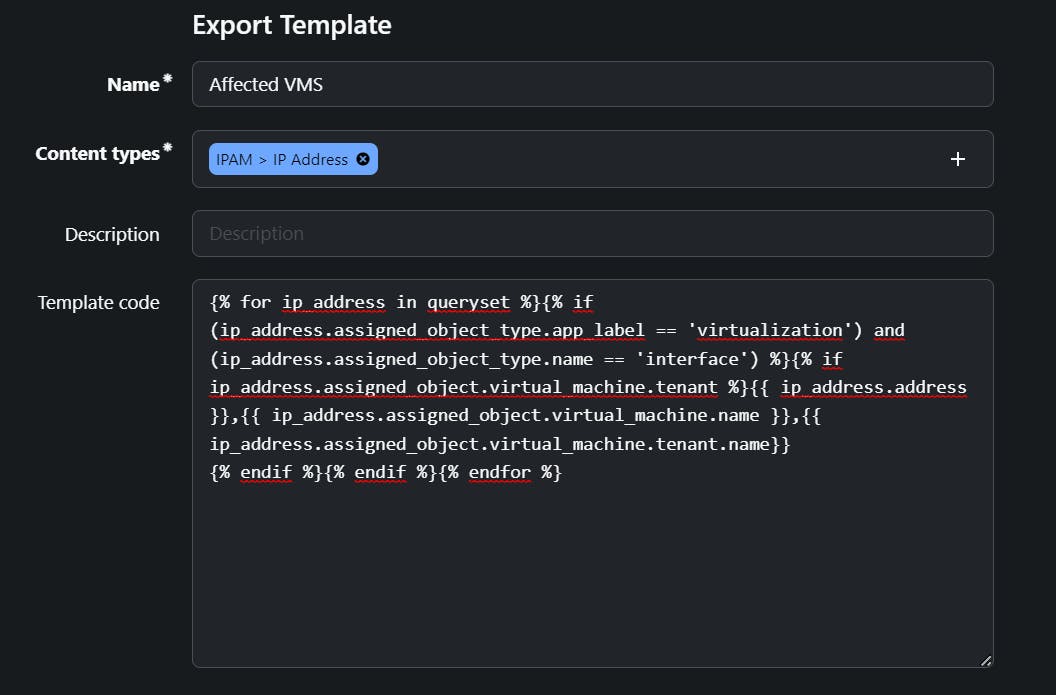
{% for ip_address in queryset %}{% if (ip_address.assigned_object_type.app_label == 'virtualization') and (ip_address.assigned_object_type.name == 'interface') %}{% if ip_address.assigned_object.virtual_machine.tenant %}{{ ip_address.address }},{{ ip_address.assigned_object.virtual_machine.name }},{{ ip_address.assigned_object.virtual_machine.tenant.name}}
{% endif %}{% endif %}{% endfor %}
Configuring NetBox
Now, to finally create an export template in your NetBox instance, follow these steps:
Go to Customization
Click on Export Template
Add
Enter your Export Template data
The following image shows an example of an export template:
Conclusion
I hope this blog post has helped you understand how to create an export template in NetBox. To build other export templates, you can follow the same process, but you will need to change the models and update the relationships between them.
Thank you for your time. Regards.